Design thinking for beginners – workshop agenda and guide

Design thinking is a great methodology for bringing human-centered thinking to your team. But how can we make it easier for newbies to grasp the five stages of the design thinking process and see how they can apply them in their day-to-day work?
In our design thinking for beginners guide, we explore how you can introduce design thinking by asking a group to solve the simple challenge of baking a cake. You’ll find a complete workshop template alongside tips to help you engage a group new to design thinking.
What if I told you that Design Thinking really is a piece of cake?
Have you ever started a workshop where the participants are a little overwhelmed at what the buzzword “design thinking” means?
“Are we designing how we think?”, one person asks. In a way, yes! We are designing our approach to creative thinking by going through a proven process in a mindful and self-reflexive way in order to find better solutions.
“Do I have to be a designer to study this, and have any prior background knowledge?” another person asks. No, the great thing about design thinking is its accessibility!
Whether brand new to the idea or a design professional, this way of thinking and collaborating, can often give us innovative, surprising and ground-breaking solutions to the challenges we face every day.
In this guide, we’ll explore how to introduce design thinking to beginners with a workshop that uses the analogy of baking a cake. We’ll walk you through the key stages of the template and offer some tips to help you along the way.
- How to run the design thinking for beginners workshop
- How baking a cake can explain design thinking
- Step 1: Empathize
- Step 2: Define
- Step 3: Ideate
- Step 4: Prototype
- Step 5: Test
- Tips for teaching design thinking
How to run the design thinking for beginners workshop
When introducing design thinking to a group, the best place to start is by answering the question, what is design thinking? Our cake design process seeks to provide the answer in an engaging, experiential format.
In the simplest definition, design thinking is a human-centered approach to problem-solving. It is often used to solve complex problems which don’t have a straightforward outcome while keeping people at the center of the discussion.
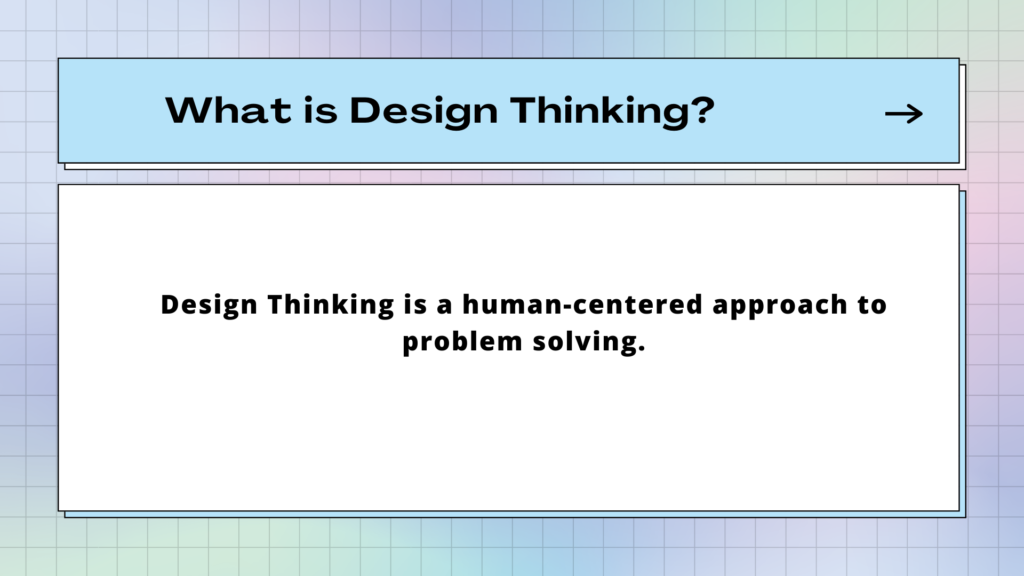
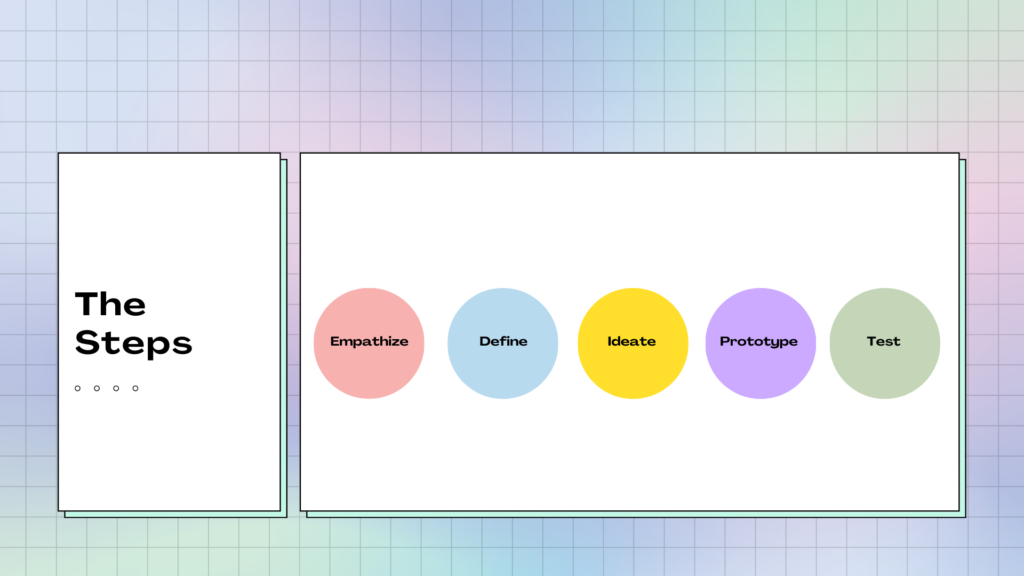
Design thinking consists of five key stages which we’ll explore in this workshop: Empathize, Define, Ideate, Prototype and Test. These five stages of design thinking form an effective process for problem-solving that is useful for any team wanting to create better solutions and products.
When introducing design thinking to beginners, it can be helpful to start with a simple, small-scale problem. This approach helps participants recognize each stage of the process, and also understand what tools and exercises are used at each point.
In this workshop, we’ll ask the group to approach the problem of baking a cake. Analogies are a useful tool to empathize with our group and I’ve found using this cake-making approach successful with many groups. By learning the design thinking process in parallel with designing a cake, the steps are fun, relatable and easy to digest. Through this process, participants will start to develop their design thinking muscles and learn how to take on bigger projects in future.
In the following sections, you’ll see how the Introduction to Design Thinking workshop explores each stage of the design process through the analogy of baking a cake. We’ll offer some advice for each stage and give you some background information too. First, let’s explore the problem at the heart of this workshop design, which is baking a cake!
How baking a cake can explain design thinking
Let’s say we are creating a cake for our friend, and we can’t decide what kind of cake to bake or to buy. The cake will be eaten by several people with different tastes and so the challenge is, “how do we ensure that everyone enjoys the birthday cake?”
We ask the group to consider different types of cake to demonstrate the scale of our problem: a cupcake, a birthday cake and a wedding cake. For example, a cupcake is designed to be eaten by one person, a low-cost treat that doesn’t warrant a special occasion. Someone might eat a cupcake every other day.
A birthday cake is designed and baked for several people. It is relatively affordable, perhaps a mid-range cost if it’s for a milestone birthday, or a low-cost supermarket purchase for a low-key, informal celebration.
A wedding cake will be seen and eaten by many guests. It is proudly displayed, and the act of the happy couple cutting into it is celebrated by close family and friends. Designed for a very special occasion, the cake will often be custom-made.
By using a simple, engaging problem like finding the right cake, the group can follow the entire design thinking process easily and have fun while doing so.
It’s worth noting that before you approach the five stages of design thinking, it’s always helpful to consider the scale of the problem and as a group, accept the project.
Starting with these simple examples of different cakes is a great way to achieve this. It’s also an effective way to engage participants and get them thinking about user needs, budgets, resources and other vital elements of the design thinking process.
Step 1: Empathize
The first part of the design thinking process is Empathize. The simplest way to introduce the Empathize stage is often by reminding everyone that design thinking is human-centered and that we are always seeking to understand our end user’s needs.
Dynamic groups who are used to problem-solving may come up with an idea straight away, and decide that they are definitely going to run with that as their solution. Someone might say, “Let’s bake a chocolate sponge cake, everyone likes chocolate,” and a few other people nod and murmur in agreement. This statement, “everyone likes chocolate,” could be identified as a common assumption, and as a facilitator, you could see this as an opportunity to demonstrate that by assuming, we aren’t empathizing with our end-user.
You could develop an exercise in which participants look for evidence to support their statement, and evidence against it, thus coming to the conclusion that “not everyone likes chocolate.” This gives our workshop participants an understanding of why it is so important to work in an empathetic manner throughout our journey.
We can then establish a variety of methods in how we might Empathize with our users:
- By Engaging with them, we can understand our user’s needs. Honest and open conversations can give us insights into our user’s preferences and needs. For example, we might conduct a simple interview or survey to find out their likes and dislikes when it comes to desserts.
- By observing them and getting involved in their daily interactions, we might find out more about their habits. Perhaps we ask them to keep a food diary, and this may help us see what tastes they have, and if there are any foods or flavors they tend to avoid.
- By Watching and Listening to them. For example, we may combine a conversation with an interaction, and ask our users to make their favorite recipe whilst talking us through the process. Here we might notice that they say one thing, but do another, or they might explain why they use a particular mix of seasoning.
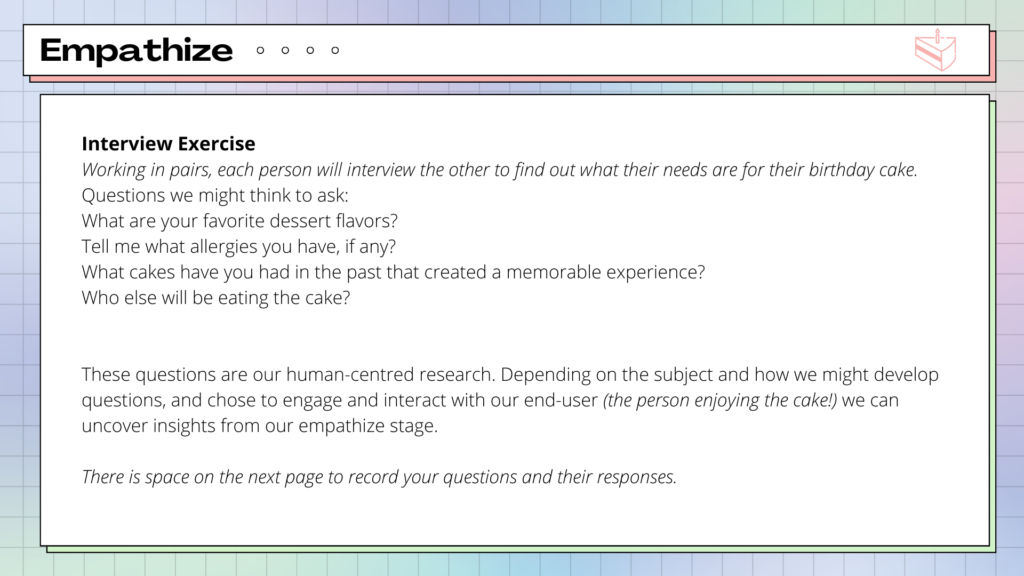
For our cake design, these insights could help us discover our user’s flavor preferences, any hobbies that might relate to the visual design of the cake; and who else might be eating the cake at the party. By using methods of empathizing to discover more information, we can get more context to our problem, and start to understand the wants and needs we hope to meet with our end product.
This workshop has been constructed with the simplest solutions in mind, and for the empathize phase, we team people up as pairs and set them the task of interviewing one another about their birthday plans. This includes open questions that could help us uncover information to aid the design of our cakes. It is often useful to suggest questions that participants might wish to use, and give examples of open questions. If there is time, you can create an exercise to develop questions from closed statements and assumptions, into open questions that don’t lead the person.
When designing a workshop, or series of workshops for participants- you might suggest that their empathize stage involves designing a cake for someone outside of the workshop group. In which case you could finish the lesson here and return back later to process a few days later, giving participants a chance to engage outside of the workshop space. The great thing about these exercises is that you have the freedom to expand them to work with your audience and how best suits their needs.
Step 2: Define
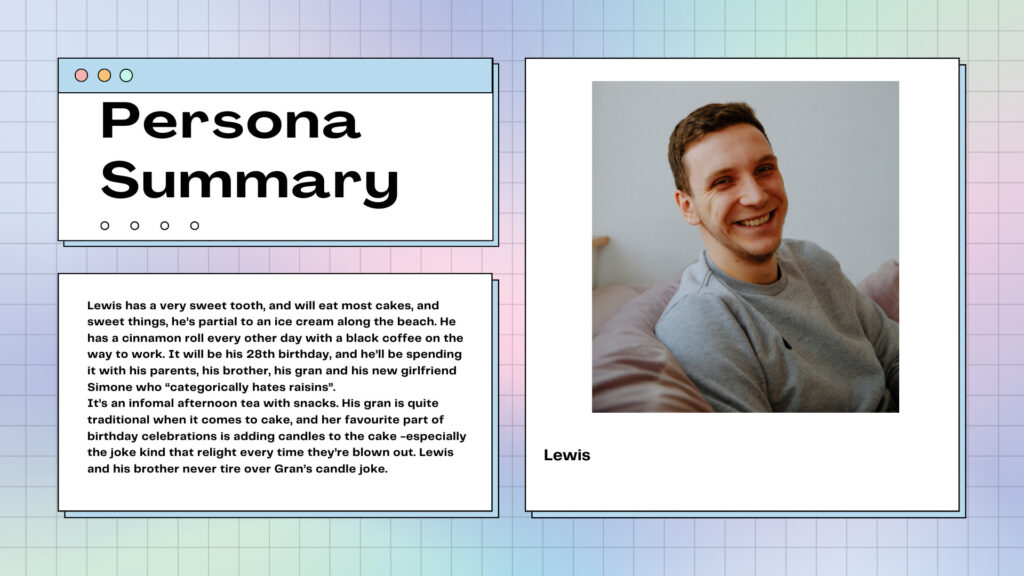
We then move into the Define stage of the design process, where we will create Personas of our partners based on their responses in the Empathize stage. When running similar workshops, I’ve found that contextualizing the data into human characters has helped the participants relate to the user’s needs. I use examples of Personas, explaining that they could be based on one person, and therefore be very real, or if they use the data from several people, they can create a fictional character with whom they will empathize and keep in mind throughout the design journey.
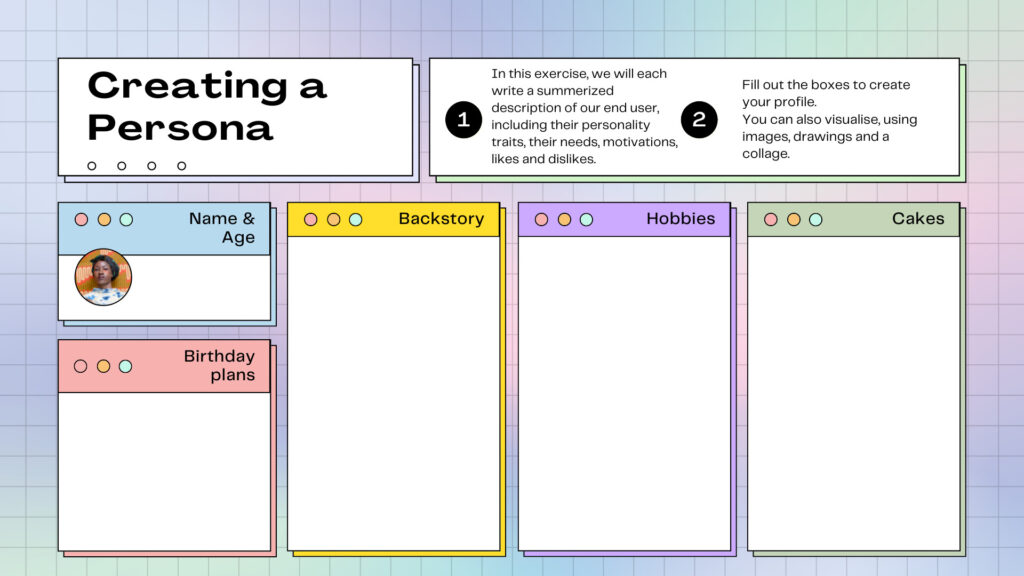
Often when the group creates their Personas, they may realize that they need more information, some saying, “Oh, I don’t know if I have asked the right questions,” in which case, we as facilitators can demonstrate that they are able to return to the empathize stage, as Design Thinking doesn’t have to be a linear process. In pairs, they can continue to fill in any blanks with their partner when creating Personas in order to get a more rounded view of their end-user.
We finish our Define process, by presenting our personas to the group, and together voting on two personas we will choose to design cakes for. We then create two teams, ensuring that the chosen Persona profiles are on opposite teams and are designed for one another.
Step 3: Ideate
In the Ideate phase we’ve chosen two exercises, one expansive and one focused. The first is a rapid-fire ideas generation session, it can be a very energetic and fast-paced assignment. It’s important to encourage all ideas, no matter how big or small, and we will set an “anything is possible” mindset. We focus on quantity, not quality and even half-baked ideas can be contributed to the discussion.
If we designed our workshop to run over a longer period, the group may wish to explore ideas further, by discovering recipes and cake designs. As a facilitator, you could mention that this form of research could identify with our Empathize stage, as well as our Ideate stage.
Before we move into our second exercise, it’s often useful to discuss and explain who our Stakeholders are. We have already mentioned that the people eating the cake would be called our end users. When considering the term “Stakeholder” this could mean anyone who is involved in the cake-making or consuming process.
There might be one person sourcing the ingredients, another baking the cake and another delivering it to our Persona. So there would be a manufacturer, a delivery and logistics person, and a supplier, who may be a supermarket chain or a local small shop. If our Persona character was a strong supporter of local business, that may play a part in where the cake ingredients were sourced. This might also be balanced with our budget and our time.
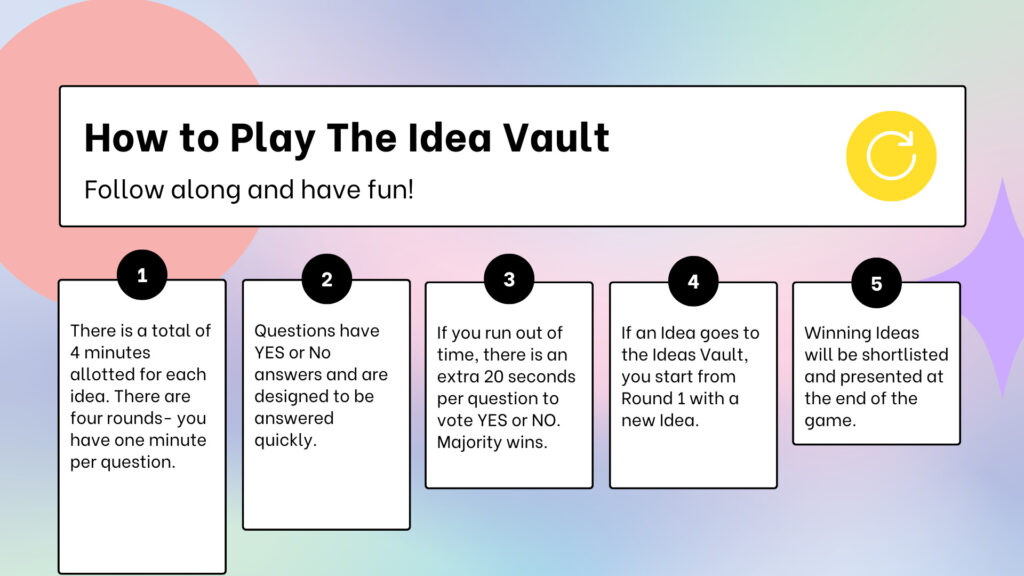
Our second exercise is called the Ideas Vault, this exercise is designed to relieve our participants of any decision-overwhelm when it comes to choosing which ideas to take forward in our prototype phase. As creative and exciting as our rapid-fire exercises are, they can leave our group with too many options, feeling swamped with potential solutions. Through the idea vault process, we are narrowing our ideas down by asking a series of questions that relate to the feasibility of the design, and if it truly meets our Persona’s needs.
We might also wish to consider if the idea excites us, as innovative ideas should light a spark within us to have the drive and momentum to carry it through to the next stage of the process. This exercise sits in the Ideate phase, but could equally be called a Defining process, as we are refining our project further, proving again the nonlinear nature of Design Thinking and the freedom to adapt it for our requirements. We’ll finish this exercise with a selection of ideas to bring through and prototype.
Step 4: Prototype
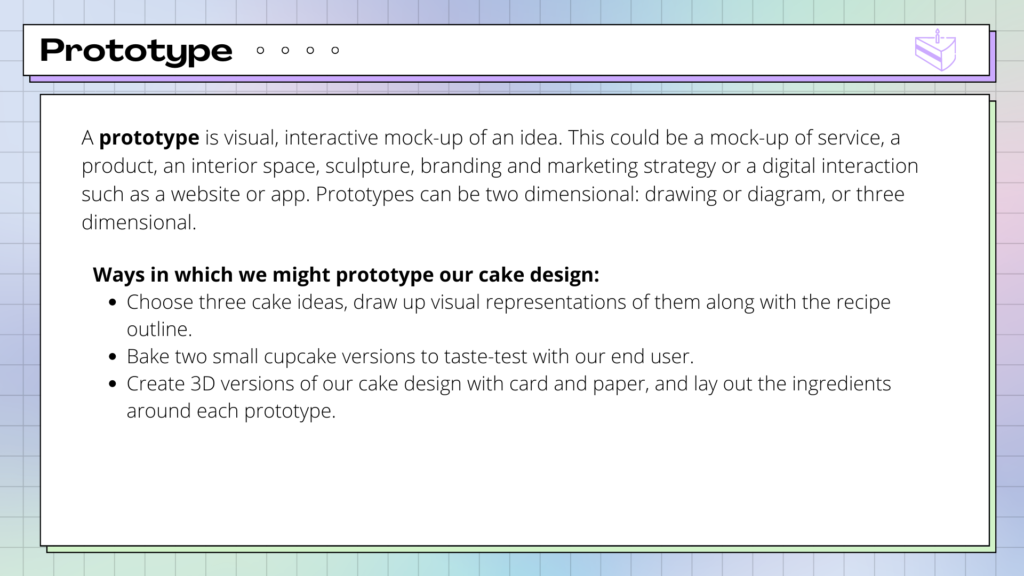
It’s very useful for participants to understand exactly what is meant by a prototype, and that it is not a near-finished product. A prototype is used to test at an early stage, gather feedback and simulate a user experience. A prototype is a visual, interactive mock-up of an idea and can be two-dimensional, for example, a drawing or a diagram, or they might take a three-dimensional form. In our presentation at the beginning of the workshop, we outline some ways in which we might prototype our cake;
- Choose three cake ideas, and draw up visual representations of them along with the recipe outline.
- Bake two small cupcake versions to taste-test with our end-user.
- Create 3D versions of our cake design with card and paper, and layout the ingredients around each prototype.
As we are going for the simplest options in our workshop, we have suggested that the teams draw visual representations, adding possible recipe ingredients and flavors which they will then present to the end-user for testing. A way in which this cake design process could be elaborated is in the context of creating the workshop alongside a school’s Home Economics class, or other groups who regularly have access to kitchens and cooking equipment. Their process could move at a slower pace over a semester, linking baking with Design Thinking and they might create small cupcake prototypes as groups.
Step 5: Test
In the final stage of the Design Thinking process, we are capturing honest responses and feedback, by inviting our end-user to a glimpse into what the final outcome might look like. By presenting our cake prototypes, our personas can imagine the delicious possibilities of their celebration dessert. We then can use our gathered insights that analyze the effectiveness of our chosen prototypes and then refine the idea accordingly.
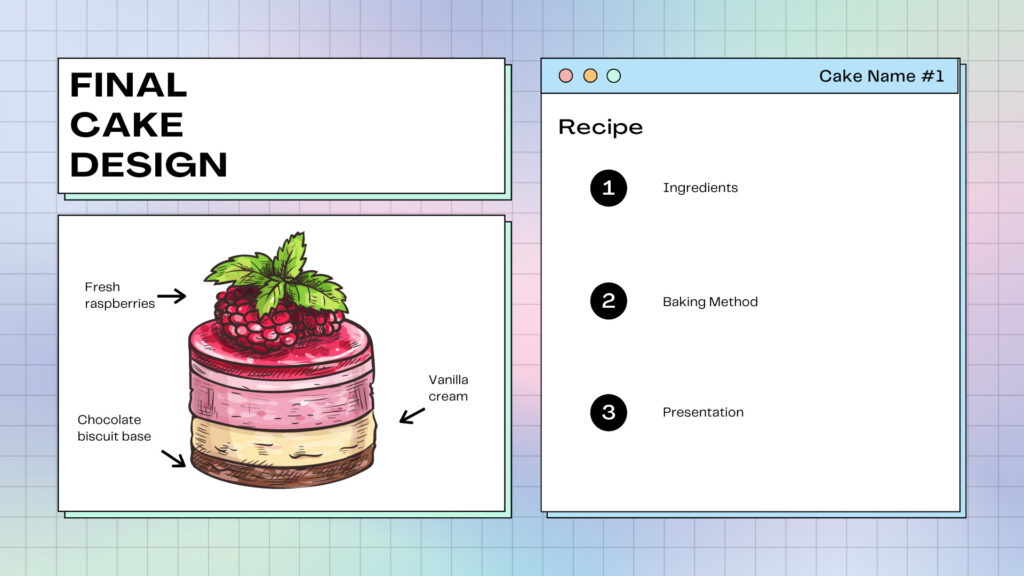
Lastly in our workshop, we celebrate by selecting a final cake outcome. As our process is a simple one, it makes sense for us to settle on a solution, and of course, as it’s a birthday, we’ll have a deadline and party to deliver the cake to! For more complex problems, we might revisit previous stages, and create further prototypes using our deeper understanding.
Tips for teaching design thinking to beginners
By following the workshop template, you’ll find a heap of tips and tricks for teaching design thinking to a new group. Below, I’ve collected a few more tips you might find useful if you are using your own design or trying another approach entirely.
- In the introduction, it’s very useful to frame the Design Thinking process as a mindset rather than a rigid set of instructions and rules.
- Create a space where everyone can have their voice heard, and where no question is a stupid question.
- If teaching design thinking online, you may wish to consider which online tools you’ll use.
- Most people learn by using the process in relation to a specific problem, you don’t have to use the cake baking analogy. You could relate it to designing a book cover, choosing a holiday destination, or buying an office desk chair. Feel free to mix up ideas that will keep your workshop engaging!
- Allowing the journey to be flexible. You may not teach the steps in a linear manner. Perhaps there is already a product in the prototype phase, and you use the tools from the Empathize stage to find out more from your users as they test the product.
- The importance of Design Thinking being user-centered can never be mentioned enough!
- Reminding students of the benefits of the Design Thinking Process is important, especially if they become bogged down or want to skip a stage.
- What they do after the workshop is the most important. It’s important that the group understand the mindset and that they can reflect on real-life scenarios they could apply Design Thinking to. A way in which you could continue their Design Thinking learning might be to check in a few days or a week after the workshop for further feedback.
In conclusion
As a facilitator, we should ensure that everyone comes away from the workshop feeling empowered, with more clarity on what Design Thinking means, and how they can apply the methods to real-life projects.
We can ensure the success of the Workshop by asking the participants about any particular projects that could benefit from these techniques. That way, if there is an opportunity to develop and deepen the process, you might create a series of workshops that aim to tackle different issues and projects.
By keeping in mind what, why and how for each Design Thinking stage and contextualizing the topic into something relatable, we can give clarity on Design Thinking and deliver it as simply as a piece of cake. What kind of projects do you think this workshop could relate to?
If you plan to use this workshop agenda, do you see it as a stand-alone learning, or as a starting point for further exploration? Please add your ideas to the comments below!

Leave a Comment