Doodling Together
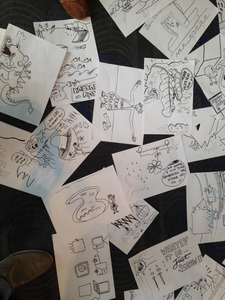
Create wild, weird and often funny postcards together & establish a group's creative confidence.
Goal
Establish creative confidence; collaborate effortlessly; build capacity for working together as a workshop-group.
Materials
Instructions
Preparation
Sitting around a table or in a circle helps but is not mandatory.
Hand out a sheet of paper or postcard & a pen to each participant. Pens in identical color and size - not too thick & not too thin - cater for better results.
Invitation
We'll create something together in the next couple of minutes.
I'll guide you through a sequence of simple tasks. Please do as directed and - especially in the last two steps - don't do more than as directed.
Instructions for the group
- Draw a form - pass your paper on to the left (or right - stick to one direction)
- Make something out of the form you got from your neighbour (an object or a person, an animal) - pass your paper on
- Add context to the paper you got from your neighbour - pass your paper on
- Add action or drama to the paper you got. Refrain from using text, this will be another step! - pass on
- Add text
Some additions/riffs after playing with it since three years:
- Do the impro-part at the begin of a workshop and use empty post-cards as paper; let people pick one design at the end & let them write their address on the back; swap again among participants and let them write a postcard with insights/ things they want to share with the person.
- Play a certain music during the doodling; I played Christmas songs once and we ended up with interesting holiday postcards
Tips for running this activity online
- Pick an online whiteboard tool that allows you to use a large, zoomable canvas.
- Create a post-it note for each participant and arrange these in a circle, with space underneath for an image. Arrange people in groups of five where possible.
- In the first step, have participants draw their first image and add it below their name tag in the whiteboard.
- For the following steps each person will drag their image and pass it to the next person in the circle.
- When facilitating full group discussion, we’d recommend that participants use non-verbal means to indicate they’d like to speak. You can use tools like Zoom’s nonverbal feedback tools, a reaction emoji, or just have people put their hands up.The facilitator can then invite that person to talk.
- If you’re not using an online whiteboard, we’d recommend using a collaboration tool such as Google Docs to place and pass your images, create a heading for each participant under which they place their image.
- Alternatively, you can use Slack and have each player private message their image to the next player at each step.
Attachments
- doodling2gether.jpg
Background
Eva-Lotta Lamm hosted an Open Space Workshop on visual improvisation at the Euviz / IFvP conference 2014 in Berlin which inspried me to adapt the sequence for team-workhops.