Multi-day agendas available in SessionLab

With the new feature, you can open separate days (day-sessions) under a session if you want to design a session that spans over multiple days. Each new day is displayed on a different tab, and you are able to display your whole multi-day session in the multi-plan view with one click.
A multi-day session is treated as one session on your dashboard, and when you invite collaborators for your multi-day session, then your collaborators automatically get access to all day-sessions as well.
In this post, we want to give you some tips for how to use this new feature. You can skip to the relevant use cases if you want to:
- Create a multi-day agenda
- Merge already existing session plans into a new multi-day session
- Add any existing session plans into an existing multi-day session
- Remove a day-session from a multi-day session into a separate session plan
Additionally, you can find a few pro tips about how to:
- Rename your days
- Change the order of your days
- Invite collaborators
- Delete a day from your multi-day session
Create a multi-day agenda
In order to create a multi-day session, you first need to create a simple session or open an existing session plan. You will find an ‘Add day’ button under the session’s name in the header.
When you click on this button, it will result in the following:
- Your initial single-day plan becomes a day-session named ‘Day 1’
- A new day-session name ‘Day 2’ gets created.
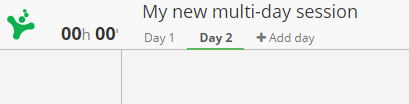
You just need to click on the day you want to work on and create your first blocks. If you want to create further days, just click on the ‘Add day’ button.
Merge already existing session plans into one multi-day session
You can merge any existing session plans into one multi-day session. This might be particularly useful if you previously created separate sessions for a workshop that spanned over several days.
In order to do it, first, open one of the sessions you want to merge and navigate to the Multi Plan View.
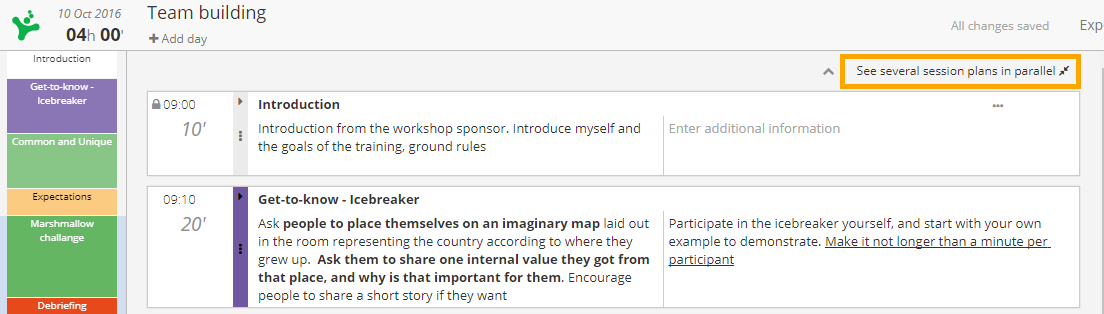
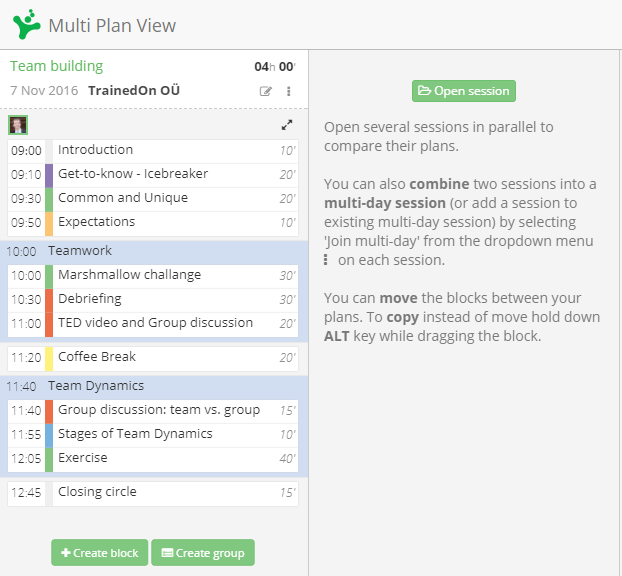
Once you are in the Multi Plan View, load the other sessions you want to be merged by clicking on Open session button and selecting the session.
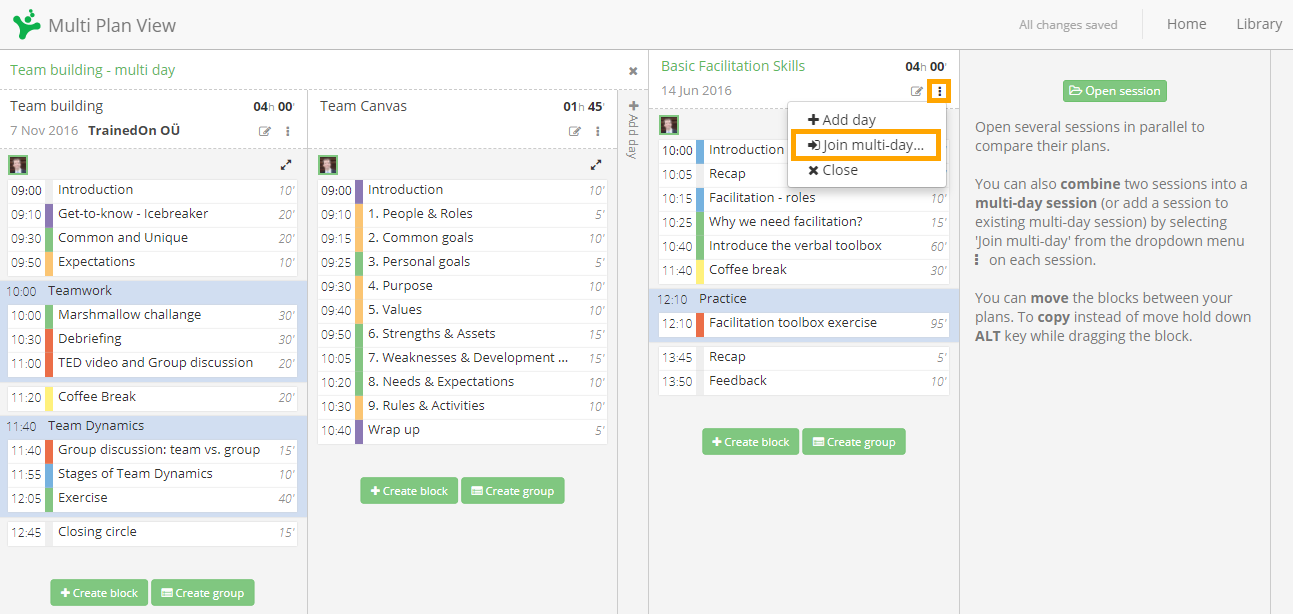
When you opened the session(s) you want to merge, click on More options icon and select the Join multi-day option: (If you have multiple sessions open in the Multi Plan View, you are able to select which one you want to merge with)
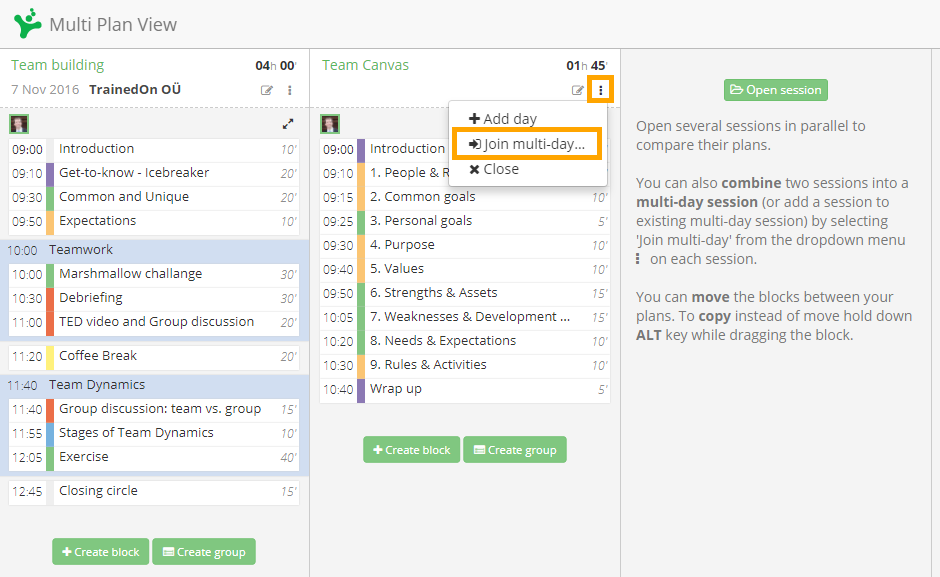
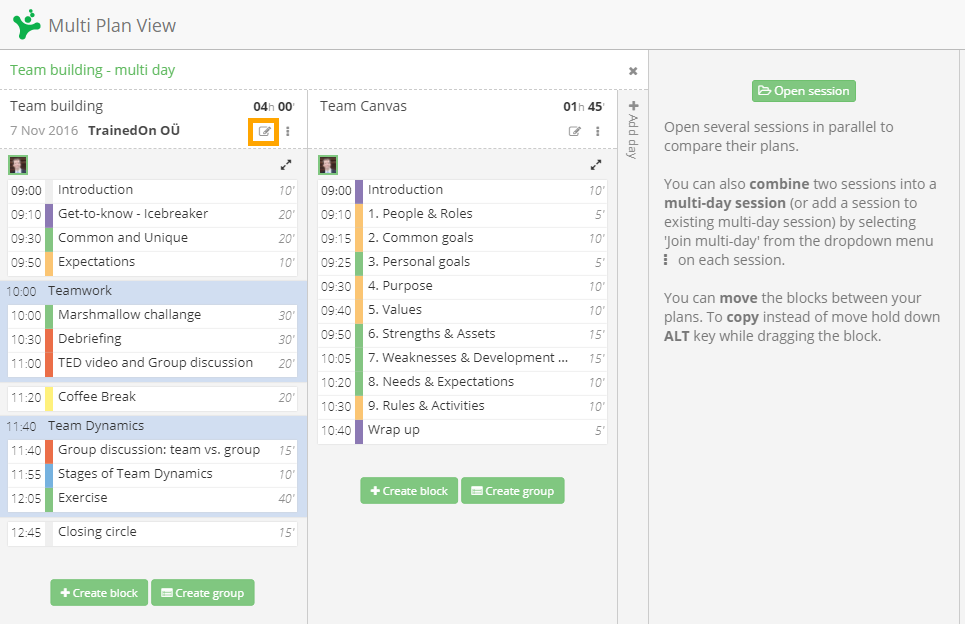
As a result, a multi-day session is created that automatically took the name of the first day-session. You can simply change the name of the multi-day session here in the Multi Plan view, and also change the name of the day-sessions if you click on the Edit icon.
Add any existing session plans into an existing multi-day session
If you want to add any of your already existing session plans into an existing multi-day session, then you should follow the same process as when merging sessions: open the sessions in the Multi Plan View, and on the session you want to merge, select the Join multi-day option.
Remove a day-session from a multi-day session into a separate session plan
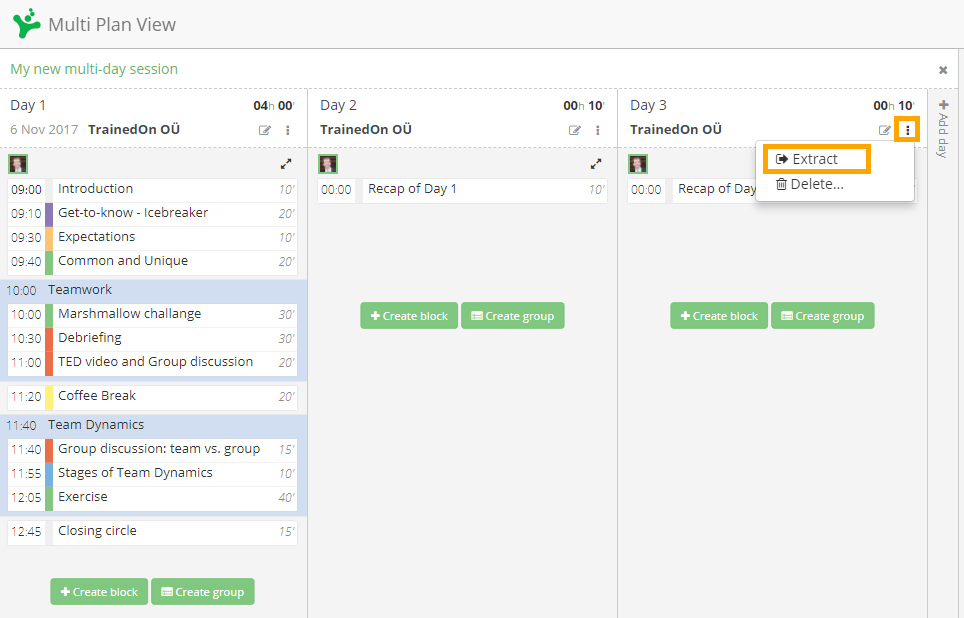
You can extract a day from your multi-day session in the Multi Plan View to become a single session. Just click on the further options icon under the day-session’s name, and select the option ‘Extract’.
Rename your days
The new day-sessions you create are automatically assigned a name, but you can change that, together with adding a description and a date for the day-session.
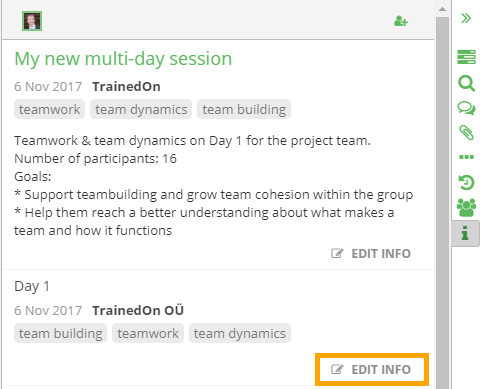
You can rename a day-session two ways. One way is to open the day-session and click on the Info tab on the right side. You can find here the description of the multi-day session at the top, and the description of the day-session under that.
When you create a multi-day session, the day-sessions will automatically inherit the client and tags from the multi-day (parent) session, but not the description. So if you want to change any of this information for the day session, just click on ‘Edit info’.
Now you are able to change the name, date, client, tags and description of the day-session.
Tip: The date of the multi-day session is always computed from the dates of the day-sessions: it will show a range of the earliest and latest day-session’s date.
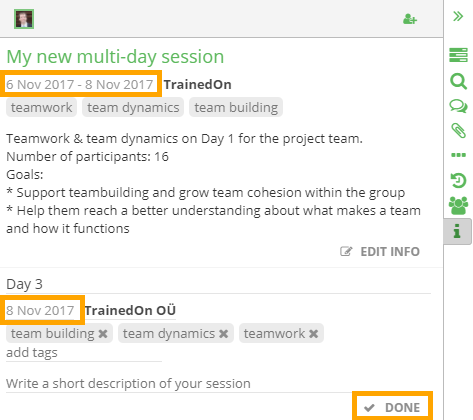
When you finished editing, just click on ‘Done’. Your changes are automatically saved as you type, so if you navigate away without clicking on Done, your changes will stay saved.
Change the order of your days
The order of your days are automatically calculated from the date of your sessions: the one with the earliest date will be the first and the one with the latest date will be the last one. If you haven’t filled out the date for your day-sessions, then further algorithms will order them based on their name (considering if there is any kind of numbering that indicates an order). If you want to change that, the easiest way is to assign the proper dates for your sessions.
Invite collaborators
When you invite collaborators for a multi-day session, then the collaborator rights you assign will be applied for each day-session. In the current version, there is no opportunity to set different collaborator rights for the day-sessions.
If you merge different session together into one multi-day session, then the collaborator rights will be added up to the multi-day session and then populated back to each day-session. If you want to merge Session A where you invited Frank as editor, and Session B where you invited Anna as viewer, then Frank will become an editor and Anna will become a viewer of both the multi-day session and for its day-sessions Session A and Session B.
When you remove a collaborator from the multi-day session, then consequently she will be removed from all day-sessions as well. (Since there is no support yet for differentiated collaborator rights per day-session).
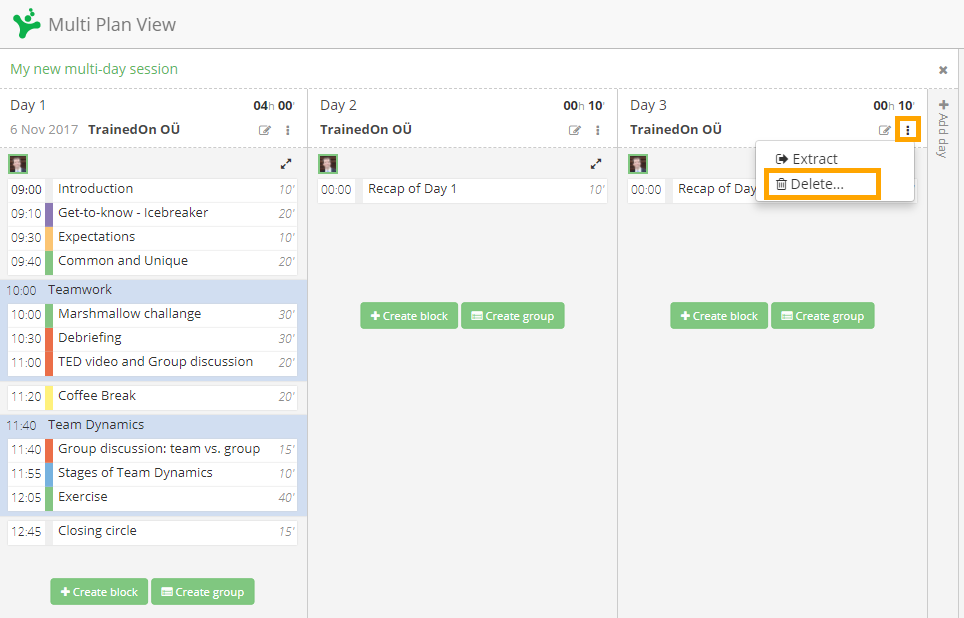
Delete a day from your multi-day session
You can delete a day from your multi-day session in the Multi Plan View. Just click on the further options icon under the day-session’s name, and select the option ’Delete’.
We hope you found this short support article useful to get started with creating and managing multi-day sessions in SessionLab. If you have any questions, just write us at support@sessionlab.com


Marvellous job! Well done!
Great to see that you like the new feature Stefan! Enjoy using, and we’re happy to hear if you have any further suggestions :-)